Theme Development Step By Step (Version II)
Step #1: Working with Template Files
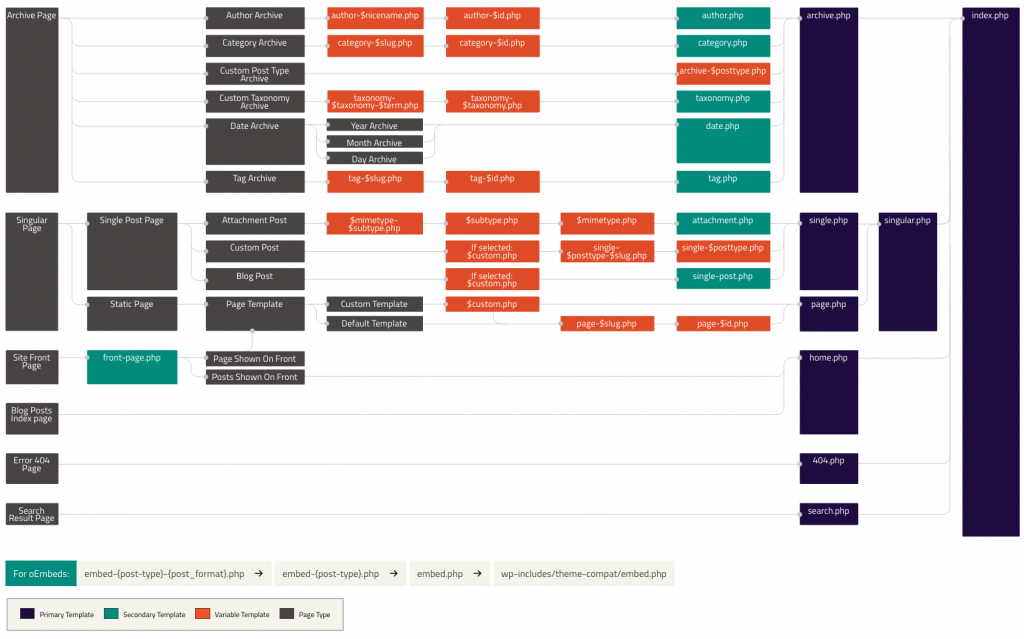
When WordPress outputs a webpage it searches for the most specific template available, if a template doesn’t exist it will move down the hierarchy until it finds one that does.
The following diagram shows which template files are called to generate a WordPress page based on the WordPress template hierarchy.
Common WordPress Template
Below is a list of some basic theme templates and files recognized by WordPress.
- index.php – The main template file. It is required in all themes.
- style.css – – The main stylesheet. It is required in all themes and contains the information header for your theme.
- header.php – The header template file usually contains your site’s document type, meta information, links to stylesheets and scripts, and other data.
- footer.php – The footer template file usually used for closing tags opened on header.php and place footer information .
- page.php – The page template is used when visitors request individual pages, which are a built-in template.
- page-{slug}.php – The page slug template is used when visitors request a specific page, for example, one with the “about” slug (page-about.php).
- singular.php – The singular template is used for posts when single.php is not found, or for pages when page.php are not found. If singular.php is not found, index.php is used.
- single.php – The single post template is used when a visitor requests a single post..
- single-{post-type}.php – The single post template used when a visitor requests a single post from a custom post type. For example, single-book.php would be used for displaying single posts from a custom post type named book. The index.php is used if a specific query template for the custom post type is not present.
- attachment.php – The image attachment template is a more specific version of attachment.php and is used when viewing a single image attachment. If not present, WordPress will use attachment.php instead.
- 404.php – The 404 template is used when WordPress cannot find a post, page, or other content that matches the visitor’s request.
- More
single.php
This template file contains codes that show the article on its own page. Will write the same code as index.php
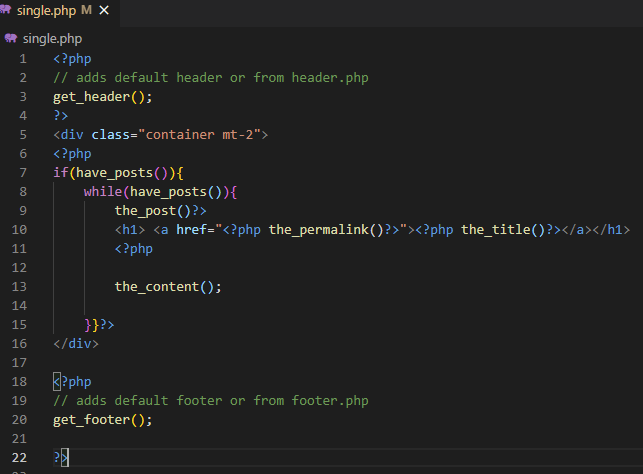
Now the single post will use this template file for display , and make sure you update the index.php by replacing the_content with the_excerpt. We have added a div with bootstrap class because will add css later.
page.php
This template file contains codes that show the content of a single page :
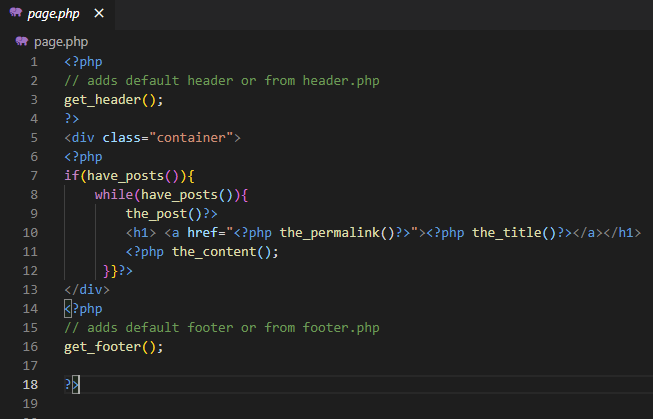
As like single.php, we have added a div with bootstrap class which we will look later .
404.php
This template file contains error code that shows that the requested file was not found.
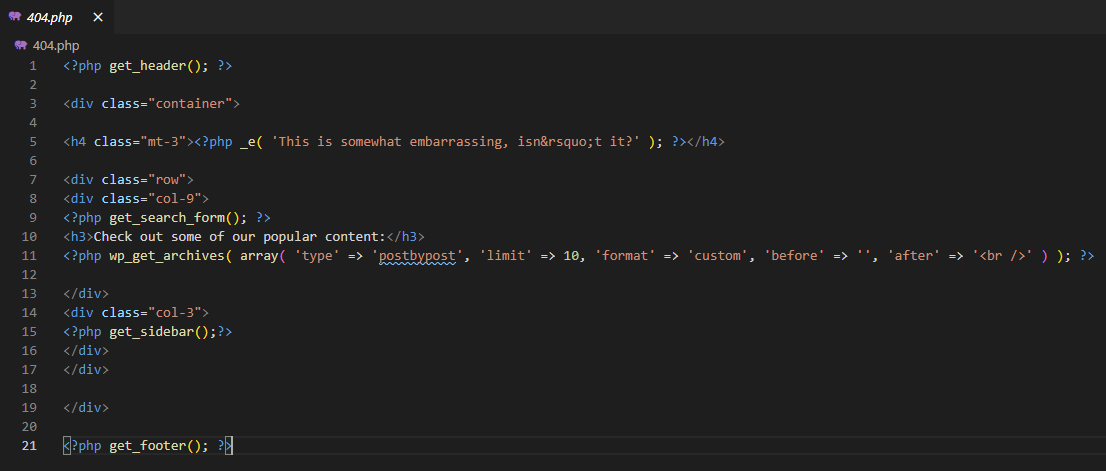
Note that three new functions are used in their most basic form : “get_search_form”, “wp_get_archives”, and “get_sidebar”. The “get_search_form” function display a search form with submit button , which allow a use to search any item on the wordpress database.
The “wp_get_archives” function retrieves the most recent post and performs the necessary configurations so that it’s displayed chronologically on the theme page. The function take an array which have description about the post type , number of posts , format , what tag to enclose before and after each post display respectively.
The “get_sidebar” function allow us to pull default sidebar widgets if there is no sidebar.php in the root folder which we will do it later . We are using bootstrap class to place the sidebar in the right side .
Step #2: Working with Navigation, Script/CSS , and Widget Area [functions.php]
The “functions.php”, is location where there are some functions that add more functionality to themes, such as the logo, menus, color, thumbnails, scripts, and stylesheets
Lets start by adding a menu support to the theme we have been working so far:
Adding Navigation Menu
Navigation menus are a feature of WordPress themes. Each theme can define its own menu locations and menu support. To add a custom navigation menu,
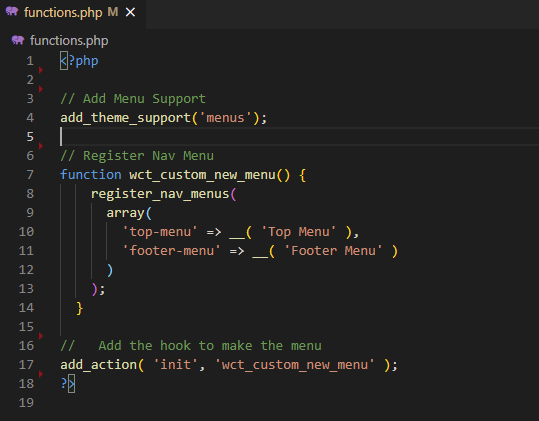
- First Make the Theme to support navigation menu using : add_theme_support('menus')
- Second , register your new navigation menu using : register_nav_menu() under a custom function and use the : add_action() hook to make it work
- Display the Navigation on any Location in the header section for now using : wp_nav_menu()
Step I and II :
Step III :
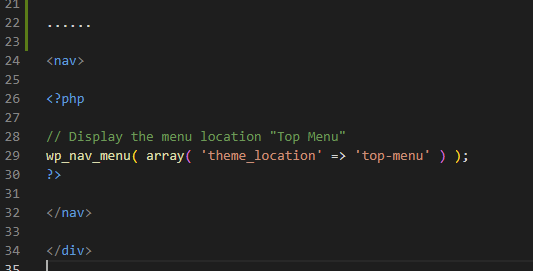
Inside header.php , we can add the navigation below the header tag :
Adding Widget Area
A widget adds content and features to a widget area (also called a sidebar). Widget areas provide a way for users to customize their site. A widget area can appear on multiple pages or on only one page. To add a widget area,
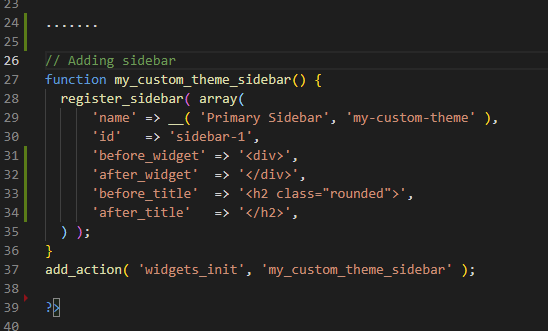
- First , register your new widget area using : register_sidebar under a custom function and use the : add_action() hook to make it work
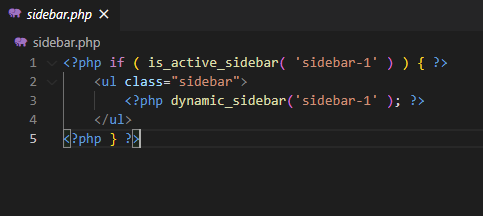
- Second , crate a sidebar.php , and inside the file check if there is active sidebar using is_active_sidebar , then display the active sidebar using : is_active_sidebar
- Last , Display the Navigation using using : get_sidebar function which we have used in 404 page
Step I :
Inside functions.php , we can add the following code :
Step II :
Inside sidebar.php , we can add the following code :
Step #3: Working with CSS and Javascript Enqueue
Without CSS, you have very limited choices to style your web pages. And without proper CSS inclusion inside WordPress, you can make it extremely hard for your theme's users to customize the theme's styling.
In order to incorporate css and Javascript we can do it in two way , which will look it one at a time in step by step fashion:
The First step is to create the folder structure and files, for demo will create a css file inside assets/css and place our style1.css and bootstrap.min.css files

Enqueue a Stylesheet [Method I]
Inside functions.php , we can add the following code, to allow the style1.css :
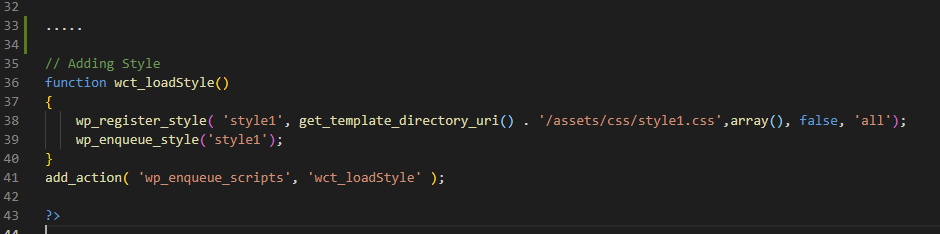
Description
- $handle (string, required) is a unique name for your stylesheet. Other functions will use this "handle " to enqueue and print your stylesheet.
- $src (string, required) refers to the URL of the stylesheet. You can use functions like get_template_directory_uri() to get the style files inside your theme's directory. Don't ever think about hard-coding it!
- $deps (array, optional) handles names for dependent styles. If your stylesheet won't work if some other style file is missing, use this parameter to set the "dependencies ".
- $ver (string or boolean, optional) is the version number. You can use your theme's version number or make one up if you want. If you don't want to use a version number, set it to null. It defaults to false, which makes WordPress add its own version number.
- $media (string, optional) is the CSS media types like "screen ", "handheld ", or "print ". If you're not sure you need to use this, don't use it. It defaults to "all ".
Enqueue a Stylesheet [Method II]
To Incorporate css , we can also use the header.php and attach using normal link tag. Lets attache the bootstrap file using this way
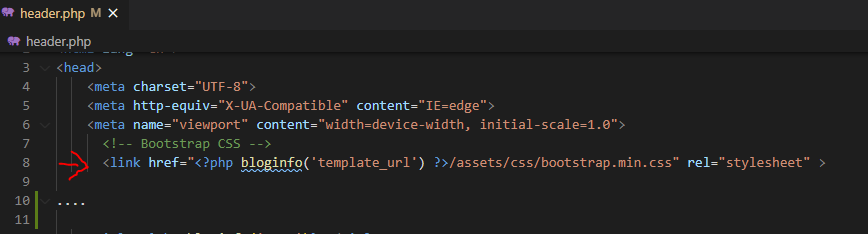
Note : You can still use CDN , instead of downloading the file in the local machine
The Full Source Code(Check Version II ) : Custom WordPress Theme