Theme Development Step By Step (Version I)
Step #1: Creating The Folder and Files
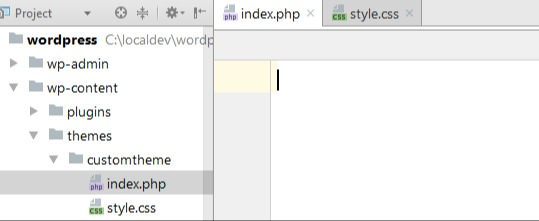
In the themes folder, three other native folders are already stored, which contain three standard themes, provided by WordPress. In addition to them, you must create another folder, which you can name as you wish.
In the example below, the folder is named customtheme . From that point, the new WordPress theme will be created.

Anatomy of a Theme
WordPress Themes typically consist of three main types of files, in addition to images and JavaScript files.
- The stylesheet called style.css , which controls the presentation (visual design and layout) of the website pages.
- WordPress template files which control the way the site pages generate the information from your WordPress database to be displayed on the site.
- The optional functions file (functions.php) as part of the WordPress Theme files.
Every WordPress theme has a series of mandatory files to work properly. In your new folder within Themes, create two files:
style.css – WP demo file used to inform the author’s name, repository, and theme version;
index.php – main file, through which WP loads the posts that will be displayed on the screen. In addition, it’s used by wp whenever a WP base file is missing.
style.css
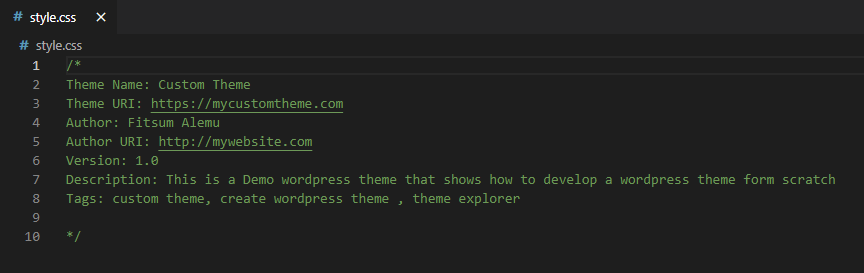
For WordPress to recognize our theme and output it properly in the Appearance → Themes list we need to place some WordPress-specific code at the top of style.css, it looks like this:
Description
- Theme Name – You should always supply a theme name. If you don’t then the folder name will be used, my-custom-theme in our example.
- Theme URI – If used, the theme URI should provide a link to a page where visitors can learn more about the theme.
- Author – Your name goes here.
- Author URI – A link to your personal or business website can be placed here.
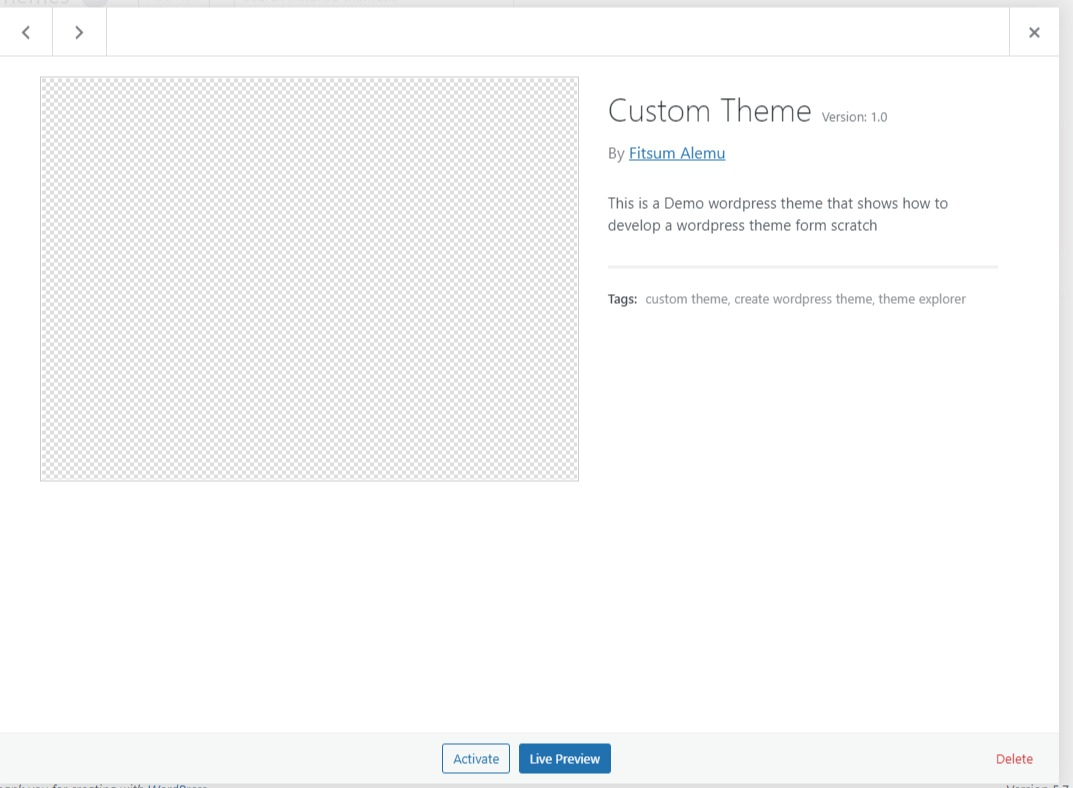
- Description – The description is shown on the wp-admin theme modal and also on the WordPress theme listing.
- Version – Version numbers help developers keep track of changes and let users know if they are using the latest version.
- License – How you license your theme is up to you, but if you choose a non-GPL-compatible license then you won’t be able to distribute your theme on WordPress.
- License URI – This is simply a link to the license listed above.
- Text Domain – The text domain is used when translating your theme into other languages.
- Tags – Tags are only used if you are uploading your theme to the WordPress.org theme directory.
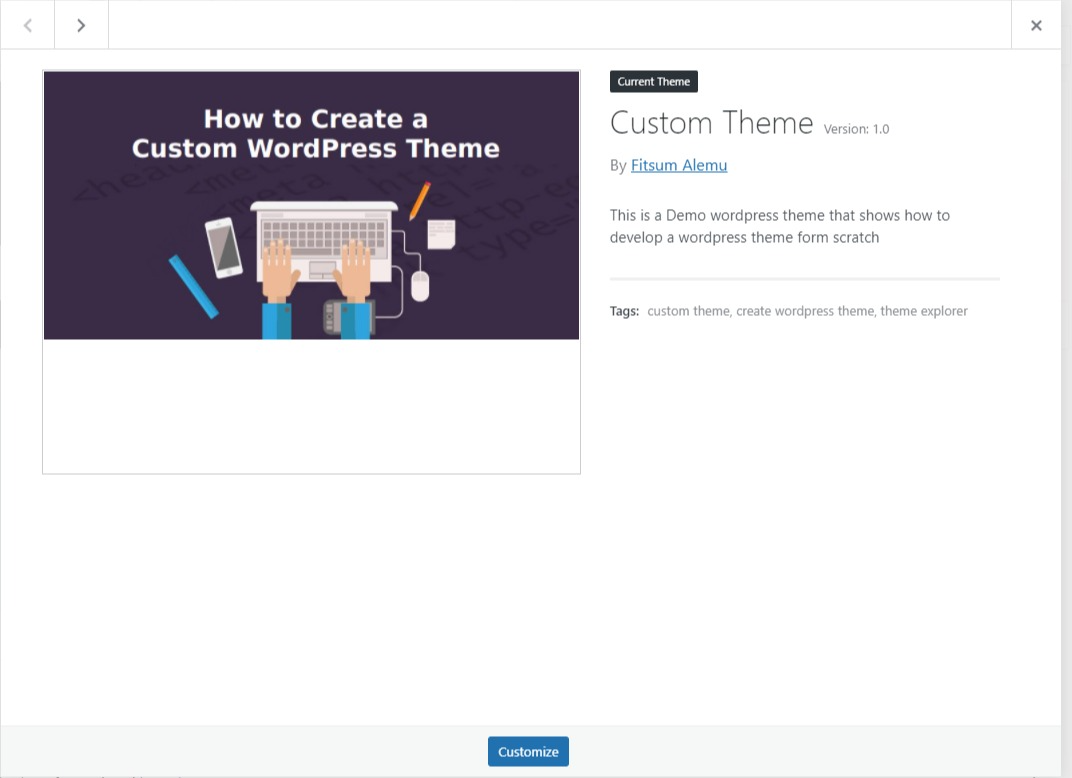
Now Under the Appearance > Themes , will find out new custom theme and can activate it
Step #2: Working with the Loop
WordPress themes are made up of template files. These are PHP files that contain a mixture of HTML, Template Tags, and PHP code. When you are building your theme, you will use template files to affect the layout and design of different parts of your website. For example, you would use the header.php template to create a header, or the comments.php template to include comments.
The most critical template file is index.php, which is the catch-all template if a more-specific template cannot be found in the template hierarchy. Although a theme only needs an index.php template, typically themes include numerous templates to display different content types and contexts.
index.php
This file is the only other strictly required file in the theme folder. Its job is to render all the front-end output for our theme.
Since index.php is going to be rendering all of our pages (home, posts, categories, archives) it’s going to be doing a lot of work.
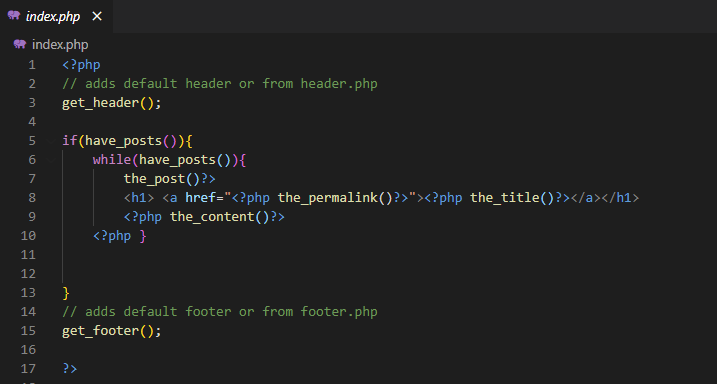
Note that two functions are used in their most basic form in this loop: “have_posts” and “the_post”. The “have_posts” function informs you if there are any postings in the database to repeat. This function will return true or false: if it returns true, there are posts available to display. If it returns false, there are none.
The “the_post” function retrieves the most recent post and performs the necessary configurations so that it’s displayed chronologically on the theme page. As this happens in a loop, whenever there is a new post, it will be added automatically if the function returns true.
The “the_content” function attaches the content to the file title inserted on the page. The “the_permalink” function matches a link to each individual post so that the user can access the content on their own and without the full text being displayed on the home page.
If you want to add a brief summary under the file title, with the first 200 characters of the content, just insert the “the_excerpt” function in place of the “the_content” function. Thus, the user only has access to the full text when clicking on the link.
The “get_header” and “get_footer” are special wordpress hooks that adds header and footer information to the website. The headers and footers can come from there respective files(header.php, footer.php) in the root directory but if there are none the hooks will display default header and footer.
Step #3: Adding header and footer fils
The next step is to create new files in the same folder as your theme, where you added the files style.css and index.php. They are called header.php and footer.php.

Now what these files will do is to overwrite the default header and footer layouts provided by default when you call either the get_header() or get_footer() functions. In fact, if we refresh our website, it looks like the header and footer are gone. This is because we have not added any markup to those files yet. Just for grins, setup the files like so to test this out.
header.php
This is the file that control's the heading part of the website :
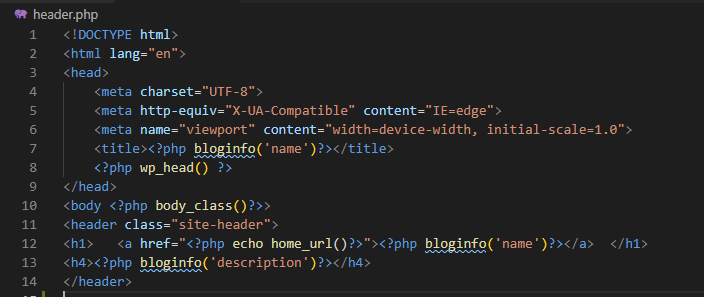
To start with, all HTML pages will have a doctype. You would specify that in this file. Additionally, all pages will have an opening html tag, a head section, and an opening body tag.
We will make use of a few new WordPress functions here as well. Those will be bloginfo and body_class. The bloginfo function will allow us to add information about the blog like name , tagline ..etx. The body_class() is a helper function provided by WordPress that will output a list of useful CSS classes which describe the page being displayed.
The purpose of wp_head() is to finalize the output in the
section of your header.php file. In fact it is meant to go just prior to the closing tag. This becomes important when you start adding various plugins to your site. It prints scripts or data in the head tag on the front end. It is a good practice to always include wp_head() in your themes as many other plugins may rely on this hook to add styles, scripts, or meta elements into the area of the site.Most themes will offer the ability to click on the title text of the website, and direct the user to the homepage of the site. This will be achieve by adding a link tag and the href will be “home_url”.
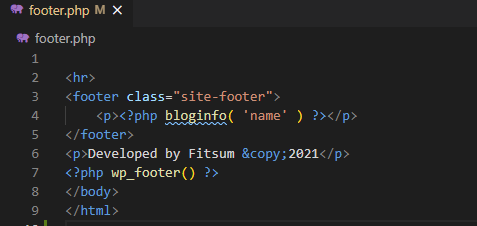
footer.php
Recall that in our header.php file we have opening html and body tags. Those need to be closed at some point. The footer.php file is a perfect place to do that. So we will add closing and
